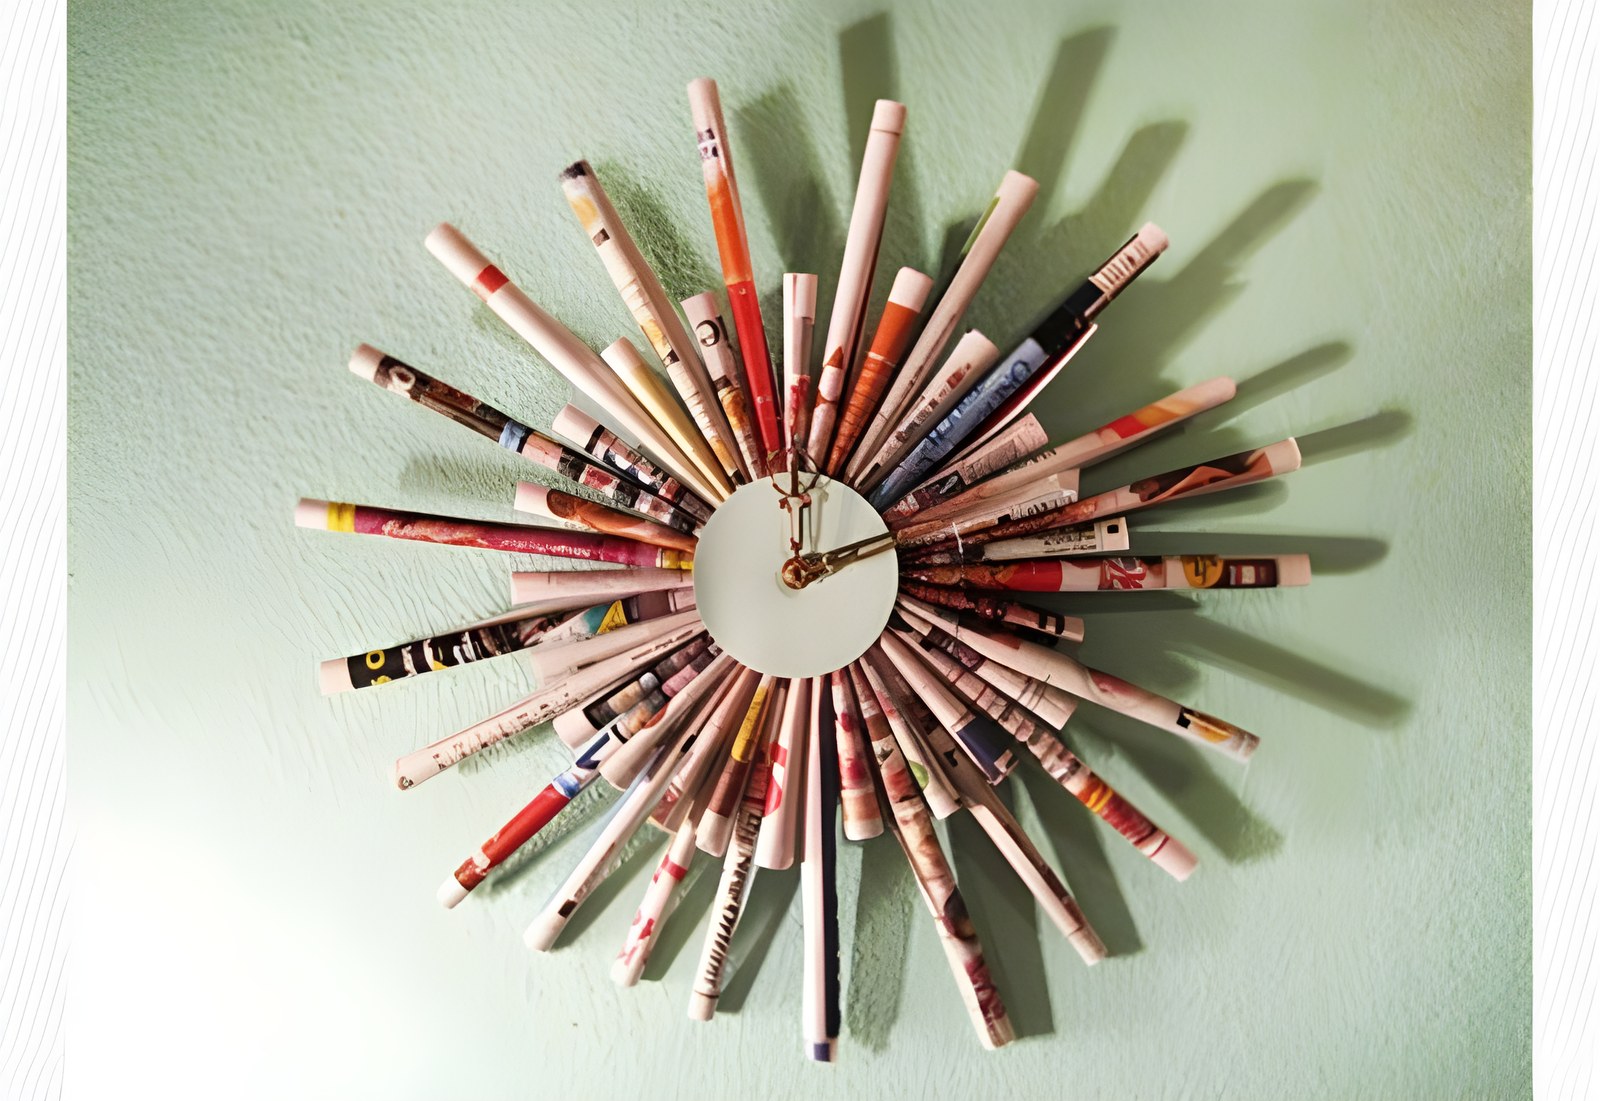
If you would like to decorate one of your walls with a modern clock but don’t want to spend a lot of money on one, this DIY project is worth a look.
Modern and authentic in style, and quite “obviously” DIY in character, the magazine-page clock is a great idea for a “weekend build”.
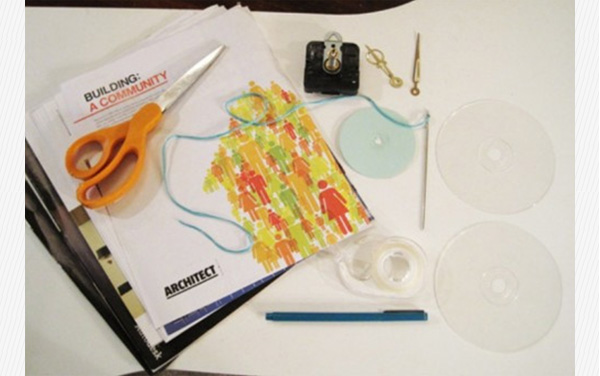
Materials you will need:
• Approximately 24 sheets of magazine pages, newspaper, greengrocer’s paper bags, or any other printed material you want to recycle, as long as all the sheets are the same size.
A needle (ideally a long one) and thread.
2 clear CD covers, like the ones found at the top and bottom of CD spindles.
A circular piece of cardboard with a hole in the centre.
A battery-operated clock movement, with hands.
Other tools: a pencil or pen, scissors, tape (ideally clear).
Instructions:
1. Start by making 24 paper tubes. Using the pencil as a guide, roll the sheets around it one by one.

2. Use tape to secure the seam of each roll along the length of the tube.
3. Next, fold over one third of each tube, as shown in the photo.

4. Thread the needle, then pass it through both sections of each tube: the folded part and the longer part.
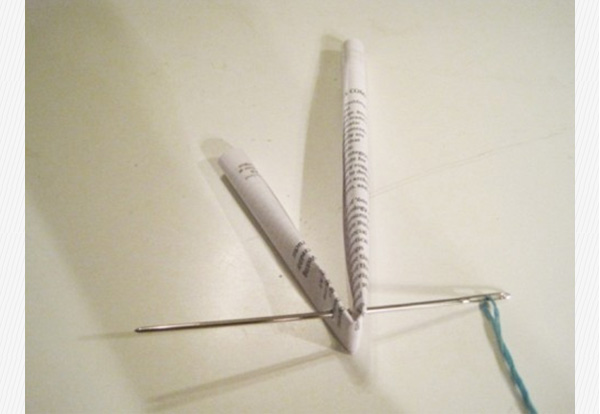
5. Once the thread has gone through the first tube, tie a knot in it to hold it in place (without cutting it or pulling it off the needle). Then continue passing the thread through the remaining 23 folded tubes in the same way.
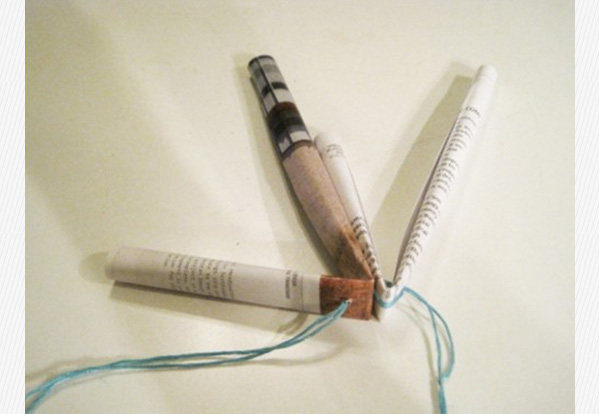
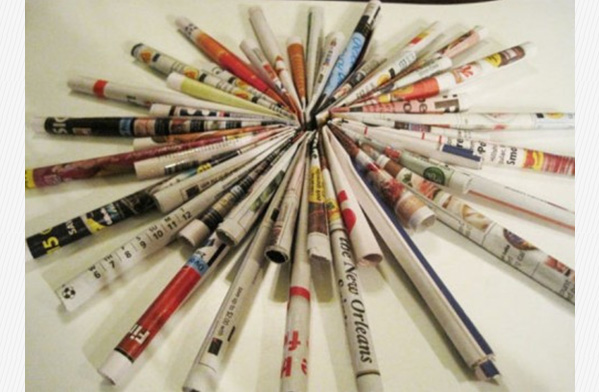
6. Take one of the 2 CD covers and position it so that its central hole sits over the hole formed by the 24 tubes. This will be the back of the clock.

7. Fit the clock movement so that the spindle that holds the clock hands passes through the hole in the CD cover and the paper structure.
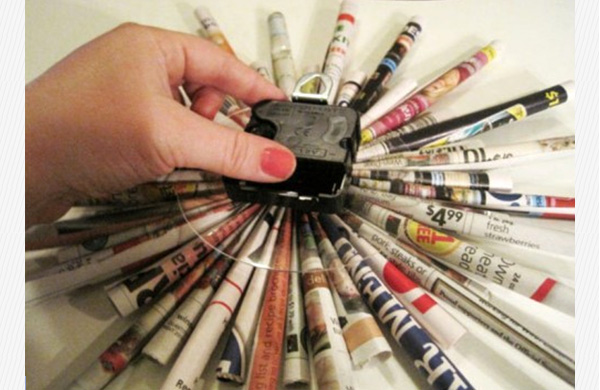
8. Turn the structure over and place the other clear CD cover on the front. Then place the cardboard circle, with its hole in the centre, over the centre of the movement. This piece is needed to hold the structure together, as the opening in the clear CD cover is too large to do so.
If you like, you can use a coloured piece of cardboard for this step!
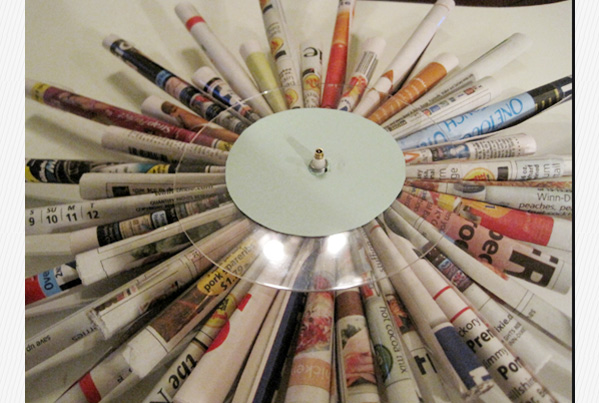

10. Attach the clock hands and your new clock is ready to hang on the wall!

Note: this project was inspired by Genevieve!
Source & photos: apartmenttherapy.com
Text-Editing: Natasa Lianopoulou