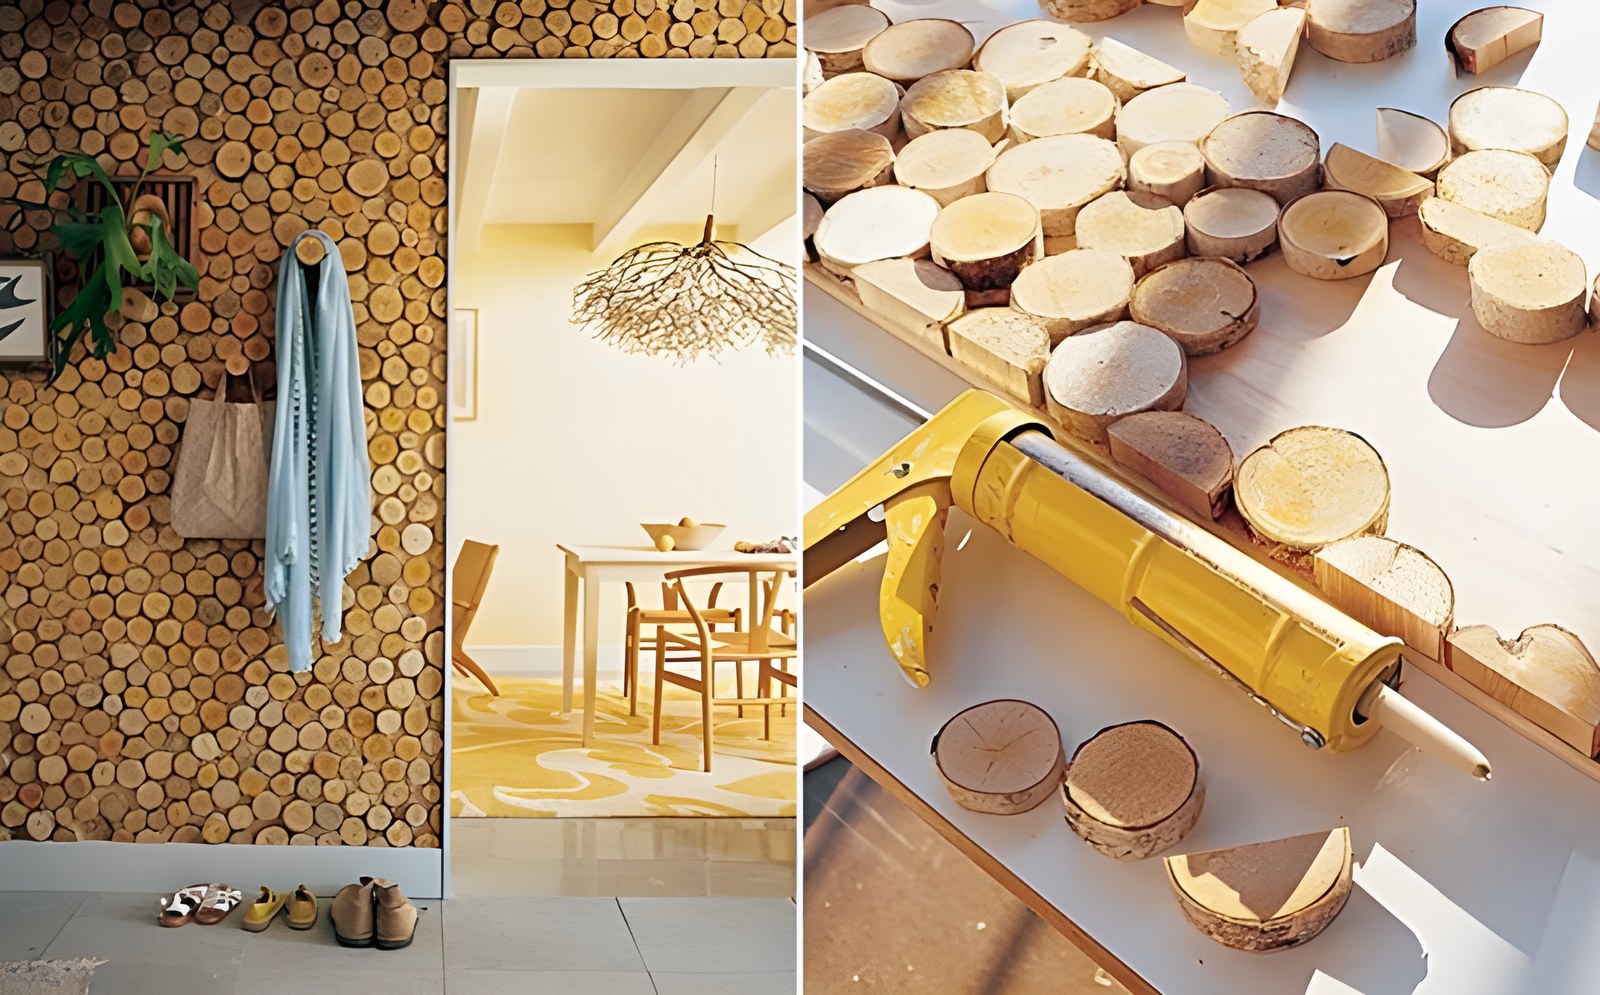
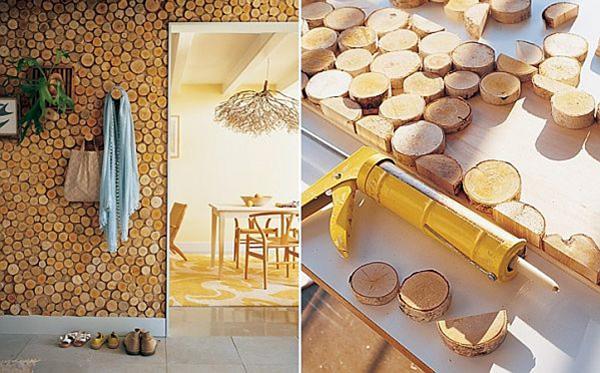
We have talked many times about the warmth that wood brings to a space. Covering a wall with pieces of birch wood, a kind of wooden wall mosaic, can achieve exactly that, combining beauty and character.
Choosing a solution like this also has practical advantages. As you build it, you can create clever hooks for coats, bags and other items by placing longer pieces of wood at strategic points.
It may take you 2 to 3 days to finish a project like this (depending, of course, on the size of the wall surface you want to cover), but it will be worth the effort.
Materials and tools you will need:
– Birch discs, either bought ready-made or cut from logs at a carpenter’s workshop. In the project we found on www.marthastewart.com, discs of roughly 1.8 to 3.8 cm in thickness were used to give the wall depth.
– For the “hooks”, a few thicker discs, 10 to 20 cm in height
– Plywood, sized to suit your wall
– A sanding block and medium or fine sandpaper
– Paintbrush
– Matte polyurethane varnish
– Construction adhesive
– Drill
– Wall screws, about 6.5 cm long
– Pliers
– Screw eyes
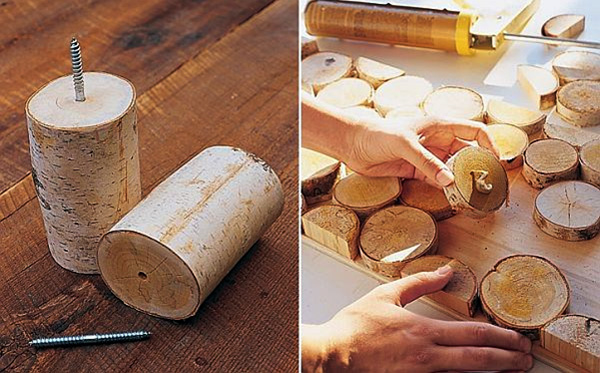
Steps
1. Before you start, make sure the wood discs are dry, otherwise the adhesive won’t hold them. Sand one side of each disc, then use the brush to apply a coat of polyurethane to the sanded side only. Leave to dry.
2. Lay the plywood on a flat surface. Arrange the discs on the plywood, including those that will serve as hooks, with the sanded side facing up. To fill the gaps at the edges of the plywood, you may need to cut some discs in half.
3. Remove the pieces that will be used as hooks; you will add them later.
4. Using the adhesive, glue the pieces onto the plywood one by one. Leave unglued only those at the corners and one along the middle of each long side of the plywood (6 spots in total), where you will drill the holes to fix the panel to the wall. Once the panel is installed, you will cover the holes with the remaining discs.
5. Use a pencil to mark the spots where the hook discs will go. Drill a hole at each spot, then drill matching holes in the base of each hook disc. Using the pliers, screw the screw eyes halfway into the hook discs, then screw them into the corresponding holes you made in the plywood.
6. Install the panel on the wall by drilling holes at the corners and screwing it into the wall anchors you have fitted. Bear in mind that, because of the panel’s weight, you will need at least 2 people to install it.
7. Place the 6 pieces you set aside over the screws and glue them in place.
You’re done!
Source & photos: www.marthastewart.com
Text: Natasa Lianopoulou